Thứ Hai, 29 tháng 12, 2014

Wordpress - Advanced Custom Fields Pro

Wordpress - Advanced Custom Fields Pro


---o0o---


Advanced Custom Fields Pro là 1 wordpress plugin, giống như Advanced Custom Fields Plugin, sau khi Active thì trong admin xuất hiện thêm 1 tab Custom Fields

So với Advanced Custom Fields Plugin thì Plugin này có thêm nhưng field sau

  • Basic: Url
  • Content: oEmbed, Gallery
  • Layout: Repeater, Flexible Content

Link Advanced Custom Fields Plugin: http://www.advancedcustomfields.com/

1. Tạo Option cho Hompage

Tạo Option

Để tạo được custom file cho Homepage ta cần khai báo thêm trong function.php để thông báo cho wordpress biết ta có thêm lựa chọn sẽ thêm custom field vào đâu


if (function_exists('acf_add_options_page')) {
    acf_add_options_page( "Options" );
}
    

Sau khi thêm đoạnc code trên thì trong phần edit field sẽ xuất hiện thêm Options cho ta lựa chọn

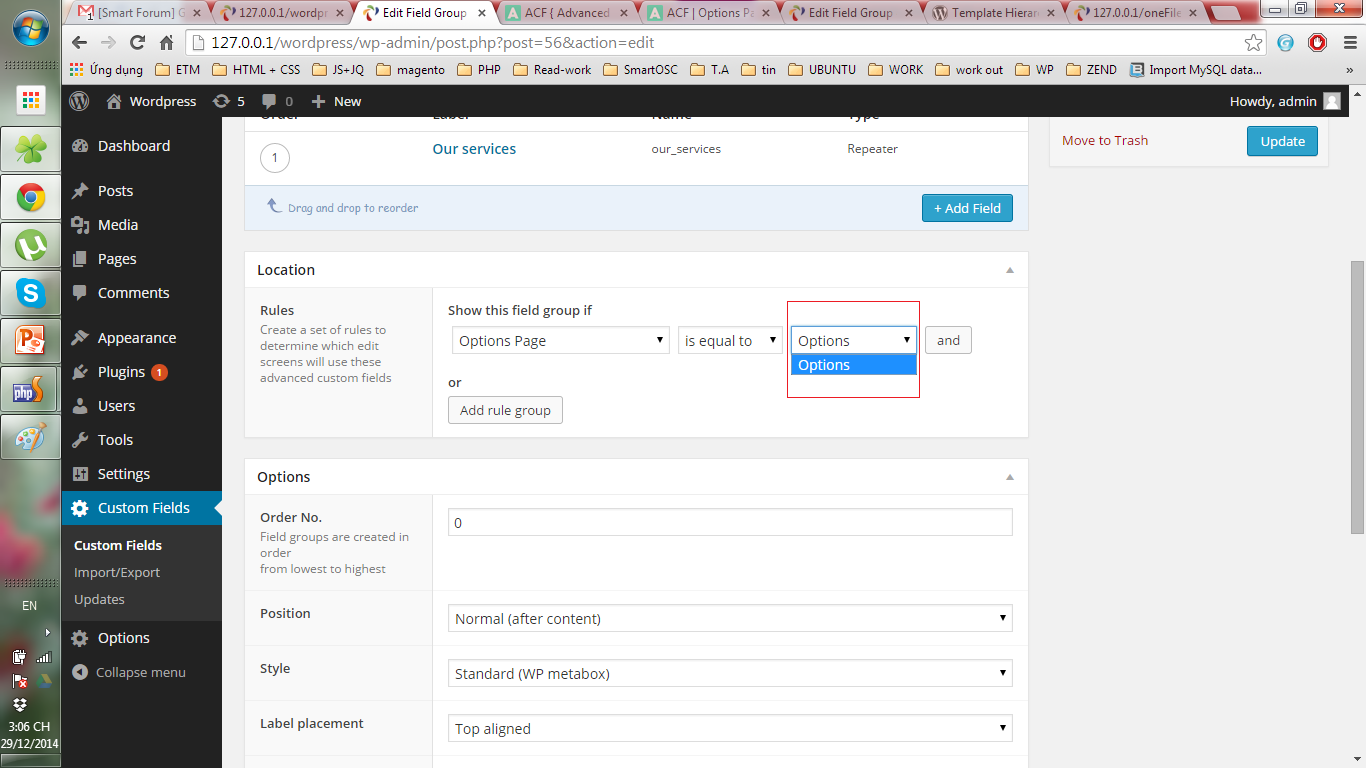
Và sẽ xuất hiện thêm 1 tab "Options" trong admin

Gọi Options ra ngoài frontend


$context['options'] = get_fields('options');
    

2. Thêm custom field cho tất cả các page

2. Tạo custom field

Tạo file page.php cho theme mới để tùy biến cho tất cả các page

Khi đó trong phần Template của Page Attributes ở trang Edit Page trong Admin sẽ thêm lựa chọn Default Template

Tạo 1 custom field mới và ở phần Show this field group if chọn như ảnh dưới

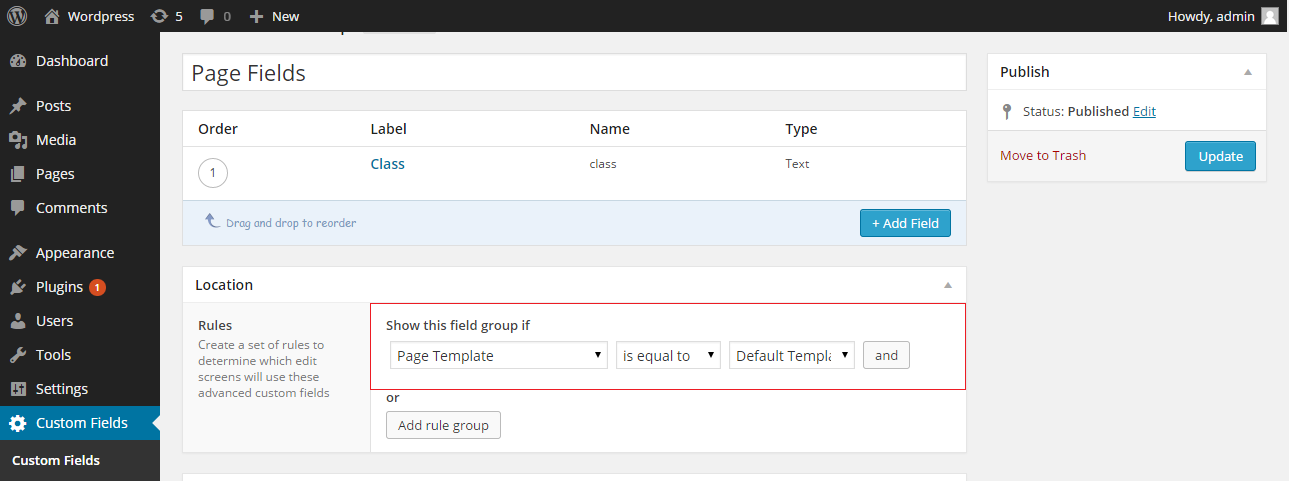
Như vậy tất cả các trang trong phần Page đều được thêm field mới

Get data

Để lấy data trong field thêm vào này chỉ cần dùng hàm get_fields(), xem chi tiết tại đây

3. Thêm custom field cho 1 page

Tạo custom field

Ví dụ ta có 1 trang Services như sau

Như vậy cần tạo 1 custom field cho trang Services để người dùng có thể chỉnh sửa được ảnh - title - content của từng form

Tạo field giống như 2 phần trên, chỉ khác ở phần Show this field group if chọn Page Template chính là trang Service thay vì Default Template

Như vậy field thêm vào chỉ xuất hiện ở trang Service

Get data

Sau khi thêm data vào backend thì lấy data bằng hàm get_fields() như ở trên

Thứ Tư, 10 tháng 12, 2014

Wordpress - Khai báo Custom Post Type

Wordpress - Khai báo Custom Post Type


---o0o---


Link bài tham kh

Viết hàm sau vào file functions.php của theme

Hàm dưới đây khai báo 2 post type là: moro_product và moro_recipe


<?php>
function create_posttype() {
    register_post_type( 'moro_product',
        array(
            'labels' => array(
                'name'  => __( 'Products' ),
                'singular_name' => __( 'Product' ),
            ),
            'public' => true,
            'rewrite' => array('slug' => 'product'),
            'taxonomies' => array('product_category'),
            'supports' => array('title'),
        )
    );

    register_post_type( 'moro_recipe',
        array(
            'labels' => array(
                'name'  => __( 'Recipes' ),
                'singular_name' => __( 'Recipe' ),
            ),
            'public' => true,
            'rewrite' => array('slug' => 'recipes'),
            'taxonomies' => array('recipe_tags'),
            'supports' => array('title'),
        )
    );
}
?>
    

* Dòng đầu tiên thông báo cho wordpress biết khi tạo trang admin thì sẽ chạy nội dung trong hàm ‘create_posttype’.

* Hàm register_post_type() có 2 tham số

  • Tham số đầu là tên post type
  • Tham số thứ 2 là 1 array, array này bao gồm các định nghĩa cho label trong post type
* 'rewrite' => array('slug' => 'product'),

   Rewrite lại url khi query.

Wordpress - Sửa lỗi chọn permalink dạng /%postname%/ bị lỗi 404 not found

Wordpress - Sửa lỗi chọn permalink dạng /%postname%/ bị lỗi 404 not found


---o0o---


Link bài viết gốc

Mặc định sau khi setup wordpress thì permalink sẽ có dạng Default là http://localhost/folder_name/?p=id

Nhưng để phục vụ tốt cho SEO ta sẽ chọn permalink có dạng Post name: http://localhost/folder_name/sample-post/

Tuy nhiên khi để ở dạng này thì ngoài front-end ta chỉ truy cập được trang home còn khi vào các trang khác thì lại báo lỗi 404

Để khắc phục lỗi này ta cần thêm file .htaccess


# BEGIN WordPress
<IfModule mod_rewrite.c>
    RewriteEngine On
    RewriteBase /folder_name/
    RewriteRule ^index\.php$ - [L]
    RewriteCond %{REQUEST_FILENAME} !-f
    RewriteCond %{REQUEST_FILENAME} !-d
    RewriteRule . /folder_name/index.php [L]
</IfModule>

# END WordPress
    

Tuy nhiên khi up code lên live site thì cần phải bỏ folder_name

# BEGIN WordPress
<IfModule mod_rewrite.c>
    RewriteEngine On
    RewriteBase /
    RewriteRule ^index\.php$ - [L]
    RewriteCond %{REQUEST_FILENAME} !-f
    RewriteCond %{REQUEST_FILENAME} !-d
    RewriteRule . /index.php [L]
</IfModule>

# END WordPress
    

Ubuntu - Một số câu lệnh cần biết

Ubuntu - Một số câu lệnh cần biết


---o0o---


  • Xem các file có trong thư mục, bao gồm cả file ần
                ls -al
            
  • permission chmod -R 777 /thư mục chmod -R 777 đường dẫn tới file cụ thể

JQuery - Thêm class vào thẻ body

JQuery - Thêm class vào thẻ body


---o0o---


Link bài viết gốc
Để thêm 1 class vào thẻ body bằng jQuery trong magento, ta chỉ cần dùng đoạn code sau
    <script type="text/javascript">// <![CDATA[
    jQuery(window).load(function() {
        var newClass = 'new-class';
        jQuery('body').addClass(newClass);
    });
    // ]]>
    </script>
Mình đã viết đoạn script để add class cho thẻ body, bạn có thể inspect element để xem :)